
Learn how to use a serger with this complete beginner’s guide. Discover threading, tension settings, stitch types, and professional finishing techniques.
Have you ever wondered how store-bought garments achieve those clean, stretchy, and durable seam finishes? The answer is often a serger. For many sewing enthusiasts, learning how to use a serger can feel intimidating at first because of the multiple threads, loopers, and tension settings. But once you understand the basics, a serger can dramatically improve the quality and speed of your sewing projects.
In this guide, you'll learn everything you need to know about using a serger, from threading and adjusting tension to creating professional-looking seams. Whether you're a complete beginner or an experienced sewist looking to expand your skills, this tutorial will help you gain confidence and achieve polished results.

What Is a Serger and How Does It Work?
If you've ever examined the inside seams of a professionally made T-shirt, dress, or pair of leggings, you've probably seen the neat rows of thread wrapping around the fabric edge. Those clean, durable seams are typically created with a serger machine. Understanding what a serger is and how it works is the first step toward achieving professional-quality sewing results at home.
A serger, also known as an overlock machine, is a specialized sewing machine designed to sew, trim, and finish fabric edges in a single operation. Unlike a traditional sewing machine that primarily creates straight or decorative stitches, a serger uses multiple threads and loopers to form strong, flexible stitches that prevent fabric from fraying. This makes it an essential tool for garment construction, especially when working with knit and stretch fabrics.
Whether you're sewing clothing, activewear, baby garments, or home décor projects, a serger can dramatically improve the appearance, durability, and efficiency of your sewing projects.

Definition of a Serger Machine
A serger machine is a high-speed sewing machine that creates overlock stitches along the edge of fabric. Most sergers use three, four, or five threads simultaneously to create secure seams while trimming excess fabric with a built-in cutting blade.
The primary purpose of a serger is to finish raw fabric edges and prevent fraying. However, modern sergers can do much more than edge finishing. They can construct garments, create rolled hems, sew stretch fabrics, gather fabric, and produce decorative flatlock seams.
Unlike standard sewing machines that rely on a bobbin and a single upper thread, sergers use loopers to interlock multiple threads around the fabric edge. This unique stitch formation creates a professional finish commonly found in ready-to-wear clothing.
Differences Between a Serger and a Sewing Machine
Many beginners wonder whether they need a serger if they already own a sewing machine. While both machines serve important purposes, they perform different tasks.
A traditional sewing machine is highly versatile and can handle straight stitches, zigzag stitches, buttonholes, topstitching, quilting, and decorative stitching. It is usually the first machine a sewist purchases because it can complete a wide variety of sewing projects.
A serger, on the other hand, is designed specifically for seam construction and edge finishing. It excels at creating strong, stretchy seams while simultaneously trimming and securing fabric edges.
Some key differences include:
- Sewing machines use a bobbin and typically one upper thread.
- Sergers use loopers and multiple thread cones.
- Sewing machines sew without trimming fabric.
- Sergers automatically trim excess fabric while stitching.
- Sewing machines are ideal for detailed construction and finishing techniques.
- Sergers provide faster seam construction and professional edge finishes.
- Sergers create stretch-friendly seams that are perfect for knit fabrics.
For most garment makers, a sewing machine and a serger complement each other rather than replace one another.
Why Sergers Are Popular Among Garment Makers
Professional garment makers and home sewing enthusiasts alike rely on sergers because they significantly improve both productivity and garment quality.
One of the biggest advantages of a serger is speed. Many sergers can sew at speeds exceeding 1,000 stitches per minute, allowing sewists to complete projects much faster than with a conventional sewing machine.
Another major benefit is durability. Overlock stitches are strong and flexible, making them ideal for garments that experience frequent stretching and movement. This is particularly important when sewing T-shirts, athletic wear, leggings, baby clothes, and knit dresses.
Sergers also create clean, polished seams that closely resemble factory-made garments. The finished edges resist fraying, helping clothing last longer and maintain a professional appearance after repeated washing and wearing.
Because of these benefits, sergers have become a staple tool in fashion design studios, tailoring workshops, and home sewing rooms around the world.
How Sergers Cut, Stitch, and Finish Fabric Edges Simultaneously
One of the most impressive features of a serger is its ability to perform multiple tasks at once.
As fabric passes under the presser foot, a built-in knife blade trims away excess seam allowance. At the same time, the needles and loopers work together to create an overlock stitch that wraps around the freshly cut edge.
This process produces a seam that is:
- Neat and professional-looking
- Resistant to fraying
- Strong enough for everyday wear
- Flexible enough for stretch fabrics
- Fast and efficient to create
Because cutting and stitching happen simultaneously, serging saves considerable time during garment construction. Instead of sewing a seam and then finishing the raw edge separately, both tasks are completed in a single pass.
This streamlined workflow is one reason many experienced sewists consider a serger indispensable.
Overlock Stitching Explained
The defining feature of a serger is the overlock stitch.
An overlock stitch is formed when multiple threads interlock around the edge of fabric. Unlike straight stitches that penetrate the fabric in a single line, overlock stitches wrap around the edge, enclosing the raw fabric and preventing unraveling.
Depending on the machine setup, overlock stitches can be created using three, four, or five threads.
Three-Thread Overlock Stitch
A three-thread overlock stitch is commonly used for finishing raw fabric edges. It provides a clean finish without adding significant bulk, making it ideal for lightweight and medium-weight fabrics.
Four-Thread Overlock Stitch
A four-thread overlock stitch adds an extra needle thread, creating a stronger seam suitable for garment construction. This is one of the most frequently used stitches for sewing knit garments.
Five-Thread Overlock Stitch
A five-thread overlock combines a chain stitch with an overlock stitch, producing an exceptionally durable seam often found in commercial garment manufacturing.
Each stitch type serves a different purpose, giving sewists flexibility when working with various fabrics and project requirements.
Built-In Cutting Blade Functionality
A built-in cutting blade is one of the key features that distinguishes a serger from a traditional sewing machine.
Located just ahead of the needles, the blade trims fabric as it moves through the machine. This ensures that seam allowances remain consistent and that fabric edges are perfectly aligned before the stitch is formed.
Benefits of the cutting blade include:
- Cleaner seam finishes
- More accurate seam allowances
- Reduced fabric fraying
- Faster sewing workflow
- Improved professional appearance
Many sergers allow users to disengage the blade when trimming is not required, offering greater control for decorative techniques and specialty stitches.
Loopers Versus Traditional Bobbins
One of the most noticeable differences when learning how to use a serger is the absence of a traditional bobbin.
Instead of a bobbin, sergers use loopers. Loopers are metal components that carry thread back and forth to create the interlocking stitch pattern characteristic of overlock seams.
Most sergers include:
- An upper looper
- A lower looper
- One or two needles
The loopers work together with the needles to wrap thread around the fabric edge, creating strong and flexible stitches.
Because loopers replace the bobbin system, sergers can sew much faster than standard sewing machines while producing unique stitch structures that are impossible to achieve with a conventional machine alone.
Types of Fabrics Suitable for Serging
A serger can handle a wide variety of fabrics, making it one of the most versatile tools in a sewing room.
Knit Fabrics
Knit fabrics are perhaps the most common materials sewn with a serger. The machine's stretch-friendly stitches allow garments to move comfortably without breaking seams.
Examples include:
- Jersey knit
- Rib knit
- French terry
- Interlock knit
- Athletic performance fabrics
Woven Fabrics
Sergers are also excellent for finishing woven fabrics by preventing fraying and creating durable seam allowances.
Common woven fabrics include:
- Cotton
- Linen
- Chambray
- Denim
- Rayon
Delicate Fabrics
With the proper tension settings and stitch adjustments, sergers can produce beautiful rolled hems and decorative finishes on lightweight fabrics such as:
- Chiffon
- Organza
- Silk
- Voile
Heavyweight Fabrics
Many sergers can handle medium- to heavyweight materials when equipped with the correct needles and thread.
Examples include:
- Sweatshirt fleece
- Canvas
- Heavy denim
- Upholstery-weight fabrics
Understanding how different fabrics interact with your serger helps ensure better stitch quality and professional results across a wide range of sewing projects.
Why Learning to Use a Serger Matters
A serger is more than just a machine for finishing seams. It is a powerful tool that can transform the quality, durability, and appearance of your sewing projects. By understanding how overlock stitches work, how loopers replace bobbins, and how the cutting blade trims and finishes fabric edges simultaneously, you'll be well on your way to creating garments that look professionally made.
Whether you're sewing T-shirts, dresses, baby clothes, activewear, or home décor items, mastering your serger can help you sew faster, achieve cleaner finishes, and elevate your sewing skills to the next level.
Understanding the Main Parts of a Serger
Before you can confidently use a serger, it's important to understand the machine's key components and how they work together. While a serger may look more complex than a traditional sewing machine, each part serves a specific purpose in creating clean, professional seams.
Many beginners feel intimidated by the multiple threads, loopers, tension dials, and cutting mechanisms found on a serger. However, learning the function of each component can dramatically improve your sewing accuracy, reduce troubleshooting issues, and help you achieve consistent stitch quality.
Whether you're sewing garments, finishing raw edges, or working with stretchy knit fabrics, understanding the main parts of a serger will make setup, threading, and stitch adjustments much easier.

Why Understanding Serger Parts Improves Sewing Accuracy
A serger is designed to perform several tasks simultaneously: trimming fabric, forming stitches, and finishing raw edges. Because multiple systems are working together, even a small adjustment to one component can affect the final stitch quality.
Knowing how each part functions helps you:
- Thread the machine correctly
- Diagnose tension problems quickly
- Prevent skipped stitches
- Create balanced seams
- Handle different fabric types effectively
- Improve overall sewing efficiency
- Extend the lifespan of your machine
The more familiar you become with your serger's components, the more confidence you'll gain when tackling sewing projects of all skill levels.
Thread Cones and Spool Holders
One of the first things you'll notice about a serger is the number of thread cones it uses. Unlike a conventional sewing machine that typically uses one upper thread and a bobbin, a serger usually requires three, four, or even five thread cones.
The spool holders are located on the top or back of the machine and are designed to hold large cones of thread. These thread cones feed smoothly into the machine during high-speed sewing.
High-quality thread is essential for successful serging because the machine operates at much faster speeds than a standard sewing machine. Poor-quality thread can lead to lint buildup, thread breakage, and uneven stitches.
Most beginner sergers commonly use:
- Three-thread setup for edge finishing
- Four-thread setup for garment construction
- Five-thread setup for industrial-strength seams
Properly positioning thread cones ensures smooth thread delivery and consistent stitch formation.
Upper and Lower Loopers
The loopers are among the most important parts of a serger. In fact, they are what make a serger fundamentally different from a traditional sewing machine.
Instead of using a bobbin to create stitches, sergers rely on upper and lower loopers to interlock threads around the edge of the fabric. These loopers move rapidly during sewing, wrapping thread around the seam allowance and creating the characteristic overlock stitch.
Upper Looper
The upper looper carries thread across the top side of the fabric edge. It works with the lower looper and needles to form secure stitches.
Lower Looper
The lower looper carries thread underneath the fabric edge and interlocks with the upper looper thread.
Together, these components create:
- Strong seams
- Flexible stitches
- Fray-resistant edges
- Professional garment finishes
Because loopers are critical to stitch formation, proper threading is essential for achieving balanced and attractive stitches.
Needles and Needle Positions
Needles play a vital role in the serging process by carrying thread through the fabric and helping form the stitch structure.
Most sergers are equipped with one or two needles, depending on the stitch type being used.
Single-Needle Configuration
A single needle is commonly used for three-thread overlock stitches, which are ideal for finishing raw fabric edges.
Dual-Needle Configuration
Two needles are used for four-thread overlock stitches, creating stronger seams suitable for garment construction and knit fabrics.
Needle position directly affects stitch width and seam strength. Different serger models may allow you to remove or reposition needles depending on the stitch technique you want to achieve.
To maintain optimal stitch quality:
- Replace needles regularly
- Use the correct needle size for your fabric
- Ensure needles are inserted fully
- Check for bent or damaged needles
Fresh needles help prevent skipped stitches and improve overall sewing performance.
Presser Foot
The presser foot holds fabric securely against the feed dogs while sewing. It helps maintain consistent fabric movement and ensures that stitches are formed accurately along the edge of the material.
Many sergers come with a standard presser foot that works well for most sewing projects. However, specialty feet are available for advanced techniques such as:
- Elastic insertion
- Gathering
- Blind hems
- Beading
- Piping
The presser foot pressure can often be adjusted to accommodate different fabric thicknesses and textures.
Proper presser foot pressure is particularly important when sewing:
- Lightweight fabrics
- Stretch knits
- Heavy denim
- Multiple fabric layers
Adjusting pressure appropriately helps prevent fabric slippage and uneven stitching.
Feed Dogs
Feed dogs are the small metal teeth located beneath the presser foot. Their job is to move fabric through the machine at a consistent rate during sewing.
As the machine operates, the feed dogs rise through the needle plate, grip the fabric, move it forward, and then drop back down before repeating the process.
This continuous movement ensures:
- Even stitch spacing
- Smooth fabric feeding
- Consistent seam quality
- Better sewing control
Modern sergers often include differential feed systems that use separate feed dog mechanisms to improve fabric handling.
Understanding how feed dogs work can help you troubleshoot issues such as:
- Fabric stretching
- Fabric puckering
- Uneven seams
- Wavy knit edges
Tension Dials
Tension dials control the amount of resistance applied to each thread as it passes through the machine.
Because a serger uses multiple threads, each thread has its own tension setting. Proper tension balance is essential for creating professional-looking stitches.
When tension is correctly adjusted:
- Stitches appear balanced
- Loops sit neatly on the fabric edge
- Seams lie flat
- Threads interlock properly
Incorrect tension can cause problems such as:
- Loose loops
- Thread breakage
- Puckered seams
- Uneven stitch formation
Most beginner sergers include color-coded threading paths and tension dials, making adjustments easier for new users.
Whenever you change fabric types, thread weights, or stitch styles, it's a good idea to test and adjust tension settings on fabric scraps before beginning your project.
Cutting Blade
The built-in cutting blade is one of the features that makes a serger such a powerful sewing tool.
Located just before the needles, the blade trims excess fabric as the seam is sewn. This creates a clean edge that is immediately enclosed by the overlock stitch.
Benefits of the cutting blade include:
- Professional seam finishes
- Reduced fabric fraying
- Consistent seam allowances
- Faster sewing workflow
- Cleaner garment construction
Many sergers feature retractable blades that can be disengaged when trimming is not needed.
Keeping the blade sharp ensures smooth cutting and helps prevent fabric distortion during sewing.
Differential Feed Controls
Differential feed is one of the most valuable features on a serger, especially when working with knit or lightweight fabrics.
Unlike standard sewing machines, sergers often have two sets of feed dogs that can move at different speeds. The differential feed control adjusts the relationship between these feed dogs.
This feature helps solve common fabric handling issues such as:
- Wavy knit seams
- Fabric stretching
- Fabric puckering
- Uneven gathering
For example, increasing differential feed can prevent stretchy fabrics from becoming distorted during sewing. Conversely, adjusting the settings can intentionally create decorative gathers and ruffles.
Learning to use differential feed correctly can significantly improve the quality of your finished projects.
Stitch Length Adjustment
Stitch length controls how closely the stitches are spaced along the seam.
Most sergers allow users to adjust stitch length depending on the project requirements and fabric type.
Shorter stitch lengths are often used for:
- Delicate fabrics
- Rolled hems
- Decorative finishes
- Fine edge finishing
Longer stitch lengths are useful for:
- Thick fabrics
- Gathering techniques
- Heavier garment construction
- Specialty decorative effects
Proper stitch length adjustment improves seam appearance, durability, and flexibility.
Experimenting with stitch length on fabric scraps can help you determine the ideal setting before sewing your final project.
Bringing It All Together
Understanding the main parts of a serger is essential for mastering overlock sewing techniques. From thread cones and loopers to tension dials, differential feed controls, and cutting blades, every component plays a critical role in creating strong, professional-quality seams.
As you become familiar with these parts and their functions, you'll find it easier to thread your machine, adjust settings, troubleshoot problems, and achieve beautiful results on a wide variety of fabrics. With practice, your serger will become one of the most valuable tools in your sewing room, helping you create garments and projects that look polished and professionally finished.
Choosing the Right Thread and Needles for Your Serger
One of the most important factors in achieving professional-looking serger stitches is selecting the correct thread and needles. Even the most advanced serger machine can produce poor results if it's paired with low-quality thread or the wrong needle type.
Whether you're sewing knit garments, finishing woven fabrics, or creating decorative edges, the thread and needles you choose directly affect stitch quality, seam durability, and overall sewing performance. Understanding how to match these supplies to different fabrics will help you avoid common problems such as skipped stitches, thread breakage, puckering, and uneven seams.
Before starting any serger project, it's worth taking a few minutes to ensure you're using the best combination of thread and needles for the fabric at hand.
Why Quality Thread and Needles Matter
Many beginners focus on machine settings when troubleshooting serger problems, but the issue often starts with the thread or needles being used.
A serger operates at significantly higher speeds than a traditional sewing machine, often exceeding 1,000 stitches per minute. Because of this, every component must work smoothly together to maintain consistent stitch formation.
Using high-quality thread and appropriate needles provides several benefits:
- Stronger and more durable seams
- Fewer thread breaks
- Reduced lint buildup inside the machine
- Improved stitch consistency
- Better fabric handling
- Less wear on machine components
- Cleaner, more professional finishes
Investing in quality sewing supplies may cost slightly more upfront, but it often saves time and frustration in the long run.
Matching Thread and Needles to Fabric Types
Different fabrics behave differently under the needle. Stretchy knit fabrics require supplies that can accommodate movement, while woven fabrics often need sharper needles and stronger seam support.
Choosing the right combination of thread and needles ensures that:
- Fabric feeds smoothly through the machine
- Stitches remain balanced
- Seams withstand regular wear
- Delicate fabrics avoid damage
- Stretch fabrics retain flexibility
As a general rule, always consider fabric weight, stretch, texture, and intended use when selecting serger supplies.
Best Thread Types for Serging
Not all sewing threads are suitable for serger machines. Because sergers use multiple threads simultaneously and operate at high speeds, thread quality plays a critical role in stitch formation.
Polyester Serger Thread
Polyester thread is widely considered the best all-purpose thread for serging.
Benefits include:
- High tensile strength
- Excellent durability
- Minimal shrinkage
- Good elasticity
- Suitable for most fabrics
- Available in a wide range of colors
Because of its versatility, polyester thread is commonly used for garment construction, knit fabrics, activewear, and everyday sewing projects.
Textured Nylon Thread
Textured nylon thread is often used for specialty applications requiring softness and stretch.
Advantages include:
- Exceptional elasticity
- Soft feel against the skin
- Excellent seam coverage
- Ideal for activewear and lingerie
This thread is frequently used in the loopers rather than the needles to create smooth, comfortable seams.
Cotton Thread
Cotton thread can be used for some serger projects but is generally less common than polyester.
Benefits include:
- Natural fiber composition
- Heat resistance
- Suitable for cotton garments
- Traditional appearance
However, cotton thread lacks the stretch and durability needed for many modern garment applications.
Polyester Versus Cotton Thread
One of the most common questions among beginner sewists is whether polyester or cotton thread is better for serging.
Both thread types have advantages, but polyester thread is typically the preferred choice for most projects.
Polyester Thread Advantages
- Strong and durable
- Slightly stretchy
- Resists shrinking
- Works well on both knit and woven fabrics
- Suitable for everyday garment construction
- Handles frequent washing and wear
Cotton Thread Advantages
- Natural fiber
- Heat resistant
- Ideal for all-cotton projects
- Traditional sewing applications
Polyester Thread Disadvantages
- Synthetic composition
- Less environmentally friendly than natural fibers
Cotton Thread Disadvantages
- Lower elasticity
- More prone to breakage
- Greater likelihood of shrinking
- Not ideal for stretch fabrics
For most serger users, polyester thread offers the best balance of strength, flexibility, and reliability.
Understanding Serger Needle Sizes
Choosing the correct needle size is just as important as selecting quality thread.
Serger needles are available in various sizes designed to accommodate different fabric weights and textures. Needle size is typically indicated by two numbers, such as 75/11, 80/12, or 90/14.
The smaller number refers to the European sizing system, while the larger number represents the American sizing system.
Common Serger Needle Sizes
Size 70/10
Best for:
- Lightweight fabrics
- Chiffon
- Organza
- Fine silk
Size 75/11
Best for:
- Lightweight cotton
- Rayon
- Lightweight knits
Size 80/12
Best for:
- General garment sewing
- Medium-weight cotton
- Jersey knit
- Linen blends
Size 90/14
Best for:
- Denim
- Sweatshirt fleece
- Heavy knits
- Canvas
Using the wrong needle size can cause poor stitch quality, fabric damage, or skipped stitches.
Needle Recommendations for Knit Fabrics
Knit fabrics require specialized needles because their fibers are constructed from loops rather than tightly woven threads.
Sharp needles can pierce and damage these loops, leading to holes, runs, or distorted fabric.
Ballpoint Needles
Ballpoint needles feature rounded tips that slide between knit fibers instead of cutting through them.
Recommended for:
- Jersey knit
- Rib knit
- Interlock knit
- Cotton knit fabrics
Stretch Needles
Stretch needles are specifically designed for highly elastic fabrics.
Recommended for:
- Spandex blends
- Activewear fabrics
- Swimwear fabrics
- Performance knits
Benefits include:
- Reduced skipped stitches
- Improved stitch formation
- Better handling of stretchy materials
For most knit sewing projects, ballpoint or stretch needles provide the best results.
Needle Recommendations for Woven Fabrics
Unlike knit fabrics, woven materials consist of tightly interlaced threads. These fabrics generally require sharper needle points to penetrate cleanly through the fibers.
Universal Needles
Universal needles work well for many medium-weight woven fabrics.
Suitable for:
- Quilting cotton
- Broadcloth
- Chambray
- Linen blends
Sharp Needles
Sharp needles provide precise penetration and are ideal for tightly woven fabrics.
Recommended for:
- Silk
- Poplin
- Microfiber
- Fine dress fabrics
Denim Needles
Denim needles feature reinforced shafts designed to handle thick materials.
Recommended for:
- Denim
- Canvas
- Twill
- Heavy cotton fabrics
Choosing the correct needle helps maintain fabric integrity while producing clean, professional stitches.
How Often Should Serger Needles Be Replaced?
Many sewing problems stem from worn or damaged needles.
As needles become dull, they may cause:
- Skipped stitches
- Fabric snags
- Thread breakage
- Uneven seams
- Excessive machine noise
A good rule of thumb is to replace serger needles:
- After every major project
- Every 8 to 10 hours of sewing
- Immediately if the needle becomes bent
- Whenever stitch quality begins to decline
Fresh needles are one of the easiest and most effective ways to improve sewing performance.
Troubleshooting Thread Breakage
Thread breakage is one of the most common frustrations for beginner serger users. Fortunately, the cause is usually easy to identify and correct.
Incorrect Threading
Because sergers use multiple threads, even one missed guide can disrupt stitch formation.
Solution:
- Completely rethread the machine
- Follow the recommended threading order
- Check all thread guides
Poor-Quality Thread
Cheap thread often contains inconsistencies that weaken the fibers.
Solution:
- Use high-quality polyester serger thread
- Avoid old or damaged thread cones
Excessive Tension
Overly tight tension settings can place too much stress on the thread.
Solution:
- Reduce tension gradually
- Test stitches on scrap fabric
Damaged Needles
Bent or dull needles can fray thread and cause breakage.
Solution:
- Replace needles regularly
- Ensure needles are installed correctly
Lint Build-Up
Accumulated lint can interfere with thread movement.
Solution:
- Clean the machine frequently
- Remove lint from tension discs and loopers
Incorrect Needle Type
Using the wrong needle for the fabric can create friction and thread stress.
Solution:
- Match needle type to fabric type
- Use stretch needles for knits
- Use sharp needles for woven fabrics
Addressing these issues can dramatically reduce thread breakage and improve overall serger performance.
Building the Foundation for Professional Serging
Choosing the right thread and needles is one of the easiest ways to improve your serging results. Quality polyester thread, properly matched needle sizes, and fabric-specific needle types work together to create stronger seams, smoother stitches, and more professional finishes.
By understanding the differences between polyester and cotton thread, selecting the correct needle for knit or woven fabrics, and learning how to troubleshoot thread breakage, you'll build a solid foundation for successful serger sewing. With the right supplies and a little practice, your serger will produce durable, beautiful seams that rival ready-to-wear garments.
Essential Serger Stitch Types Every Beginner Should Know
One of the biggest advantages of owning a serger is the variety of stitch types it can create. While a traditional sewing machine typically relies on straight stitches and zigzag stitches, a serger offers specialized stitch options designed for garment construction, edge finishing, decorative techniques, and working with stretch fabrics.
Understanding the most common serger stitch types is essential for achieving professional-looking results. Each stitch serves a specific purpose, and knowing when to use the right stitch can improve seam durability, fabric appearance, and overall garment quality.
Whether you're sewing knit clothing, finishing raw edges, creating decorative hems, or making activewear, mastering these essential serger stitches will help you get the most from your machine.
Why Understanding Serger Stitch Types Matters
Many beginner sewists use the same stitch for every project, but different fabrics and sewing techniques often require different stitch configurations.
Choosing the correct serger stitch helps:
- Create stronger seams
- Prevent fabric fraying
- Improve garment durability
- Accommodate fabric stretch
- Produce decorative finishes
- Reduce seam bulk
- Achieve professional results
Most modern sergers can produce several stitch variations by adjusting thread count, needle position, stitch width, and tension settings.
Learning these stitch types allows you to confidently tackle a wider variety of sewing projects.
Four-Thread Overlock Stitch
The four-thread overlock stitch is often considered the most versatile and commonly used serger stitch. It combines two needle threads with two looper threads to create a strong, flexible seam suitable for garment construction.
For many sewists, this is the default stitch used for assembling clothing.
How the Four-Thread Overlock Stitch Works
The stitch uses:
- Left needle thread
- Right needle thread
- Upper looper thread
- Lower looper thread
Together, these threads create a seam that is both secure and stretchable. The stitch wraps around the fabric edge while simultaneously joining fabric pieces together.
Best Uses for Four-Thread Overlock Stitch
This stitch is ideal for:
- T-shirts
- Leggings
- Pajamas
- Knit dresses
- Baby clothes
- Sweatshirts
- Casual garments
Because the seam stretches with the fabric, it is particularly effective for knit fabric construction.
Benefits of Four-Thread Overlock Stitch
Advantages include:
- Strong seam construction
- Excellent durability
- Flexible stretch performance
- Professional garment finish
- Fast assembly of clothing projects
If you're learning how to use a serger, the four-thread overlock stitch will likely become your most frequently used stitch.
Three-Thread Overlock Stitch
The three-thread overlock stitch is primarily designed for edge finishing rather than seam construction. It uses one needle thread and two looper threads to wrap the raw edge of the fabric.
Because it uses fewer threads, the stitch creates less bulk while still preventing fraying.
How the Three-Thread Overlock Stitch Works
The stitch consists of:
- One needle thread
- Upper looper thread
- Lower looper thread
This creates a neat edge finish without the added strength provided by a second needle thread.
Best Uses for Three-Thread Overlock Stitch
Common applications include:
- Finishing seam allowances
- Lightweight garments
- Decorative edge finishes
- Home décor projects
- Woven fabric construction
- Delicate fabrics
Many sewists use a traditional sewing machine to construct a seam and then finish the raw edges with a three-thread overlock stitch.
Benefits of Three-Thread Overlock Stitch
Advantages include:
- Reduced seam bulk
- Lower thread consumption
- Fast edge finishing
- Clean professional appearance
- Excellent fray prevention
For lightweight fabrics, the three-thread overlock stitch often provides the perfect balance between durability and flexibility.
Rolled Hem Stitch
A rolled hem stitch creates a narrow, tightly wrapped edge that looks elegant and professional. This decorative finish is especially popular for lightweight and delicate fabrics.
Many commercial garments use rolled hems because they provide a polished appearance without adding significant weight or bulk.
How a Rolled Hem Stitch Works
During a rolled hem setup:
- Fabric edge is rolled inward
- Threads wrap tightly around the rolled edge
- Stitch width is reduced
- Tension settings are adjusted
The result is a compact, decorative hem that encloses the raw fabric edge.
Best Uses for Rolled Hem Stitch
Rolled hems are commonly used for:
- Scarves
- Chiffon garments
- Silk blouses
- Ruffles
- Napkins
- Table linens
- Lightweight dresses
- Decorative sewing projects
Because of its elegant appearance, the rolled hem stitch is often used as both a functional and decorative element.
Benefits of Rolled Hem Stitch
Advantages include:
- Professional decorative finish
- Lightweight hem construction
- Reduced fabric bulk
- Clean edge appearance
- Ideal for delicate fabrics
Once mastered, rolled hems can dramatically elevate the look of handmade garments and accessories.
Flatlock Stitch
The flatlock stitch is one of the most distinctive stitches available on a serger. Unlike traditional overlock seams, flatlock seams are designed to lie flat against the fabric.
This stitch is commonly used in sportswear, activewear, and decorative garment applications.
How a Flatlock Stitch Works
A flatlock stitch is created by:
- Adjusting needle tension
- Loosening looper tensions
- Pulling the seam open after stitching
When opened, the seam lays flat and reveals a ladder-like decorative effect on one side.
Best Uses for Flatlock Stitch
Popular applications include:
- Activewear
- Athletic shirts
- Yoga pants
- Performance garments
- Decorative seams
- Children's clothing
- Casual knitwear
Because the seam lies flat, it reduces bulk and improves comfort during movement.
Benefits of Flatlock Stitch
Advantages include:
- Decorative appearance
- Reduced seam bulk
- Comfortable against the skin
- Excellent for stretch fabrics
- Professional sportswear finish
Flatlock stitching is particularly valuable when creating garments designed for physical activity.
Narrow and Wide Overlock Stitches
Most sergers allow users to adjust stitch width by changing needle positions and cutting width settings. This creates narrow and wide overlock stitch variations.
These adjustments help optimize seam finishes for different fabric types and project requirements.
Narrow Overlock Stitch
A narrow overlock stitch creates a smaller, more delicate edge finish.
Best used for:
- Lightweight fabrics
- Chiffon
- Organza
- Silk
- Fine garments
- Decorative edging
Benefits include:
- Minimal bulk
- Elegant appearance
- Lightweight finish
- Delicate fabric compatibility
Wide Overlock Stitch
A wide overlock stitch provides greater coverage and durability.
Best used for:
- Denim
- Fleece
- Heavy knits
- Sweatshirt fabrics
- Thick woven materials
Benefits include:
- Increased seam strength
- Better edge protection
- Enhanced durability
- Suitable for heavier fabrics
Adjusting stitch width allows sewists to tailor seam finishes to specific fabrics and achieve more professional results.
Choosing the Right Serger Stitch for Your Project
Selecting the appropriate serger stitch depends on several factors:
- Fabric type
- Fabric weight
- Stretch requirements
- Desired appearance
- Seam strength needs
- Decorative considerations
As a general guideline:
| Stitch Type | Primary Purpose | Best Fabric Types |
|---|---|---|
| Four-Thread Overlock | Garment construction | Knits, stretch fabrics |
| Three-Thread Overlock | Edge finishing | Lightweight and woven fabrics |
| Rolled Hem | Decorative finishing | Chiffon, silk, scarves |
| Flatlock Stitch | Decorative seams | Activewear, knit garments |
| Narrow Overlock | Delicate edge finishing | Lightweight fabrics |
| Wide Overlock | Heavy-duty finishing | Denim, fleece, heavy knits |
Understanding these stitch options allows you to maximize your serger's capabilities and create garments that look professionally made.
Mastering Serger Stitches for Better Sewing Results
Learning the essential serger stitch types is one of the most important steps toward becoming a confident serger user. From the versatile four-thread overlock stitch to decorative rolled hems and flatlock seams, each stitch offers unique benefits for specific sewing applications.
By understanding when to use each stitch and how different stitch configurations interact with various fabric types, you'll be able to create stronger seams, cleaner finishes, and more professional-looking projects. As your skills develop, these serger stitch techniques will become invaluable tools for garment construction, decorative sewing, and advanced fabric finishing.
Step-by-Step Guide to Sewing with a Serger
Learning how to sew with a serger can feel intimidating at first, especially if you're accustomed to using a traditional sewing machine. With multiple threads, loopers, tension settings, and a built-in cutting blade, a serger may appear complex. However, once you understand the basic workflow, you'll discover that serging is one of the fastest and most efficient ways to construct garments and finish fabric edges.
A serger allows you to trim, stitch, and overlock fabric simultaneously, creating durable and professional-looking seams in a fraction of the time required by conventional sewing methods. By following a simple step-by-step process, beginners can quickly gain confidence and start producing high-quality sewing projects.
Whether you're making T-shirts, dresses, activewear, baby clothes, or home décor items, this guide will walk you through the essential steps for successful serging.
Why Following a Proper Serging Workflow Matters
Unlike a standard sewing machine, a serger performs several functions at once. Because the machine cuts and stitches simultaneously, proper preparation and handling are crucial for achieving clean, accurate seams.
Following a consistent workflow helps:
- Improve stitch quality
- Prevent fabric waste
- Reduce sewing mistakes
- Maintain even seam allowances
- Create professional finishes
- Increase sewing efficiency
- Minimize thread and tension issues
Once these steps become second nature, serging becomes faster, easier, and far more enjoyable.
Prepare Your Fabric
Every successful serging project begins with proper fabric preparation. Taking a few extra minutes before sewing can significantly improve your final results.
Prewash Your Fabric
Before cutting or sewing, it's generally recommended to prewash your fabric according to the manufacturer's care instructions.
Prewashing helps:
- Remove factory finishes
- Prevent future shrinkage
- Eliminate excess dye
- Improve fabric stability
- Ensure accurate garment sizing
This step is especially important for natural fibers such as:
- Cotton
- Linen
- Rayon
- Bamboo blends
Skipping prewashing may result in finished garments shrinking or becoming misshapen after laundering.
Press the Fabric
After washing, press the fabric to remove wrinkles and folds.
Smooth fabric:
- Cuts more accurately
- Feeds evenly through the serger
- Produces straighter seams
- Improves stitch consistency
Using a steam iron before sewing can make a noticeable difference in the quality of your finished project.
Trim Uneven Edges
Although a serger includes a built-in cutting blade, excessively uneven fabric edges can still affect stitch quality.
Before serging:
- Remove loose threads
- Trim jagged edges
- Square up fabric pieces
- Align pattern pieces accurately
Starting with clean fabric edges allows the cutting blade to work more efficiently and helps create smoother seams.
Check Pattern Markings
If you're constructing a garment, transfer any necessary markings before beginning to sew.
These may include:
- Notches
- Darts
- Seam intersections
- Match points
- Pocket placements
Proper marking ensures accurate assembly throughout the project.
Position the Fabric
Correct fabric positioning is essential for achieving straight, consistent seams.
Because the serger cuts fabric as it sews, proper alignment becomes even more important than with a conventional sewing machine.
Align Fabric with Seam Guides
Most sergers include seam guide markings on the machine bed or needle plate.
These guides help you maintain:
- Consistent seam allowances
- Straight stitching lines
- Accurate garment construction
- Professional seam appearance
As you sew, keep the fabric edge aligned with the chosen seam guide rather than focusing solely on the needle area.
This technique promotes greater accuracy and reduces wandering seams.
Understand Blade Placement
One of the most important skills for beginner serger users is understanding where the cutting blade is located.
The blade trims excess fabric just before the needles and loopers form the stitch.
When positioning fabric:
- Allow the blade to trim only a small amount
- Avoid removing excessive fabric
- Keep seam allowances consistent
- Watch blade alignment during curves
Many beginners accidentally cut away too much fabric by positioning material too far into the blade.
Practicing on scrap fabric can help develop confidence and control.
Test Stitch Placement First
Before sewing your actual project, run a few test seams on scrap fabric.
This allows you to verify:
- Seam width
- Cutting amount
- Stitch formation
- Tension balance
- Blade positioning
Testing first can prevent costly mistakes on your project fabric.
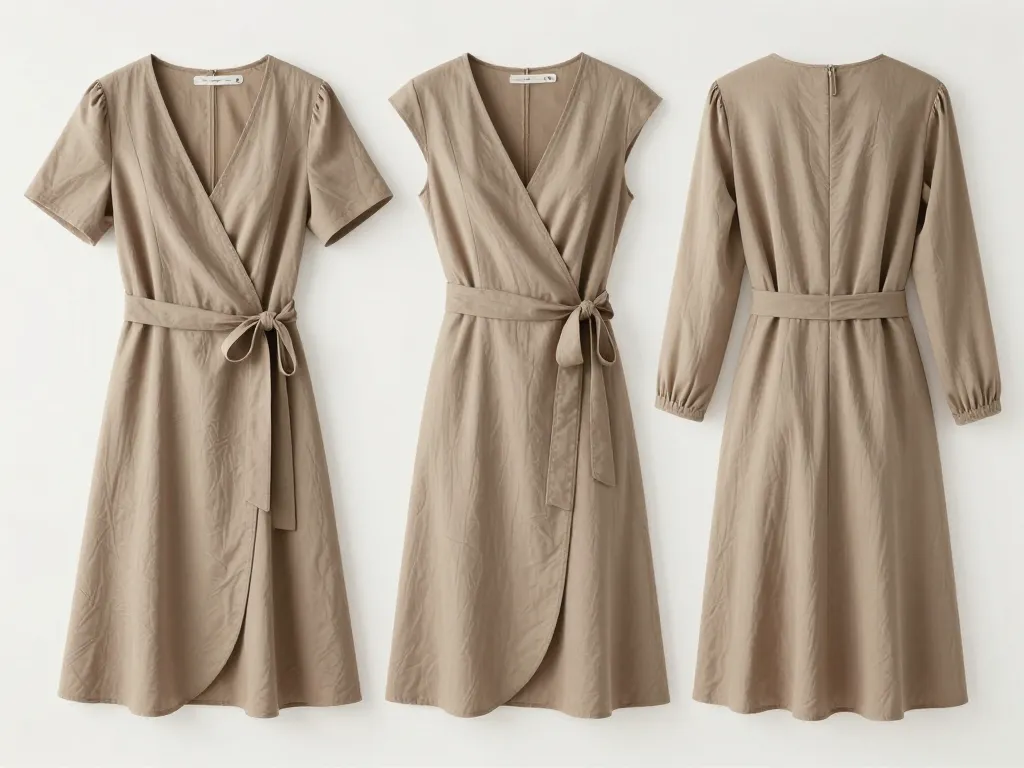
Flowing garments are perfect for practicing serger skills. Browse these maxi dress sewing patterns to create elegant dresses with beautifully finished seams and hems.
Many sewists use a serger when making maxi dress sewing patterns because the machine handles long seams and lightweight fabrics quickly and efficiently.
If you love creating comfortable, stylish garments, these maxi dress sewing patterns offer plenty of opportunities to practice rolled hems and professional seam finishes.
Start Serging
Once your fabric is properly positioned, you're ready to begin sewing.
The startup process is simple but plays an important role in creating secure, consistent seams.
Lower the Presser Foot
After placing the fabric beneath the presser foot:
- Align the edge properly
- Lower the presser foot completely
- Ensure the fabric lies flat
The presser foot holds the material securely while the feed dogs move it through the machine.
Sewing with the presser foot raised can result in thread tangling and poor stitch formation.
Begin the Stitch Chain
Most sergers require a thread chain before sewing begins.
To create a chain:
- Turn on the machine.
- Press the foot pedal.
- Allow several inches of thread chain to form.
- Position the fabric under the presser foot.
The thread chain ensures that all loopers and needles are functioning correctly before sewing starts.
Feed Fabric Smoothly
As sewing begins:
- Guide the fabric gently
- Avoid pulling or pushing
- Allow feed dogs to move the material naturally
- Keep fabric aligned with seam guides
The machine should do most of the work.
Pulling fabric through the machine can distort seams and negatively affect stitch quality.
Focus on Consistency
Rather than watching the needles constantly, focus on maintaining consistent fabric alignment.
This simple habit often results in straighter, more professional-looking seams.
Maintain Consistent Speed
Maintaining a steady sewing speed is one of the keys to successful serging.
Beginners often experience uneven seams because they alternate between sewing too slowly and too quickly.
Control Fabric Movement
The feed dogs are designed to move fabric through the machine at the correct rate.
To avoid problems:
- Guide the fabric lightly
- Keep hands relaxed
- Avoid forcing the material
- Let the machine feed naturally
Gentle guidance provides the best control.
Avoid Fabric Stretching
Stretch fabrics require special attention during serging.
Pulling on knit fabrics while sewing can create:
- Wavy seams
- Distorted edges
- Uneven stitch formation
- Misshapen garments
Instead:
- Support fabric gently
- Keep fabric flat
- Allow differential feed to do the work
- Avoid excessive tension with your hands
Proper handling helps maintain garment shape and professional seam quality.
Use a Comfortable Sewing Speed
Most sergers are capable of very high speeds, but beginners should start slowly.
Benefits of moderate speed include:
- Better control
- Improved accuracy
- Easier troubleshooting
- Reduced mistakes
As your confidence grows, you'll naturally become faster and more efficient.
Once you've mastered basic serger techniques, you can start creating beautiful garments using various dress sewing patterns designed for beginners and advanced sewists alike.
Looking for your next sewing project? Explore our collection of dress sewing patterns featuring casual, formal, and seasonal designs for every skill level.
Finish the Seam
Properly finishing a serged seam is just as important as starting it correctly.
A secure finish prevents unraveling and gives the project a polished appearance.
Create a Thread Chain
As you approach the end of the seam:
- Continue sewing beyond the fabric edge
- Allow several inches of thread chain to form
This thread chain secures the stitch formation and provides material for seam finishing techniques.
Most sewists create a chain approximately 3 to 6 inches long.
Secure Serged Ends
Unlike traditional sewing machine stitches, serger stitches do not automatically lock at the beginning or end.
Several methods can secure the seam:
Weaving the Thread Chain Back Into the Seam
Use a large-eye needle or seam needle to pull the thread chain through the overlock stitches.
Benefits include:
- Invisible finish
- Professional appearance
- Durable seam security
Tying Off the Chain
For simple projects, tie the thread chain into a small knot close to the seam.
This method is:
- Quick
- Easy
- Effective for many applications
Using Seam Sealant
Some sewists apply a small amount of seam sealant to secure thread ends.
This method is commonly used in commercial garment production.
Trim Excess Threads
After securing the seam:
- Trim thread tails neatly
- Remove loose fibers
- Inspect seam quality
Clean finishing details contribute significantly to a professional appearance.
Inspect the Finished Seam
Before moving to the next step of your project, examine the seam carefully.
Check for:
- Balanced tension
- Even stitch formation
- Consistent seam width
- Proper edge coverage
- Secure thread ends
Correcting issues immediately is easier than repairing them later.
Building Confidence with Every Serged Seam
Mastering how to sew with a serger comes down to following a consistent workflow. By preparing your fabric properly, positioning it accurately, starting the stitch chain correctly, maintaining a steady sewing speed, and finishing seams securely, you'll achieve cleaner and more professional results with every project.
As you gain experience, these steps will become second nature. Whether you're constructing garments, finishing raw edges, or creating decorative sewing projects, developing strong serging habits will help you sew faster, improve stitch quality, and produce beautiful seams that rival ready-to-wear clothing.
Learning how to use a serger may seem overwhelming initially, but mastering the basics can transform your sewing projects. By understanding threading, tension settings, stitch types, differential feed, and proper maintenance, you'll be able to create professional-quality garments and home décor projects with ease.
Start with simple projects, practice on fabric scraps, and don't be afraid to experiment with different settings. Before long, your serger will become one of the most valuable tools in your sewing room, helping you achieve clean, durable, and beautifully finished seams every time.

0 Comments